
Getting Inconsistent Blood Pressure Readings at Home? How to Measure Reliably
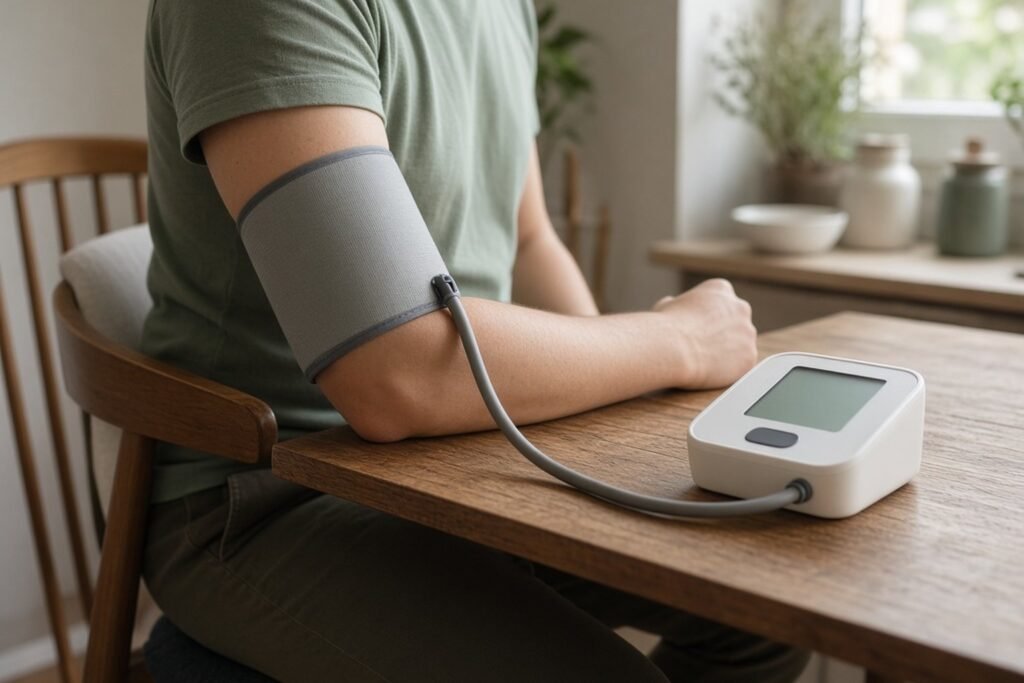
Home blood-pressure readings are more useful when the setup is consistent. Learn the practical steps that reduce avoidable measurement error and make your log easier to interpret with a clinician.
October 19, 2026 • Preventive Health
What this guide covers: measuring blood pressure at home so the numbers are reliable: choosing a validated upper-arm monitor, cuff size, posture, and the common causes of odd readings. For what to write down, how long to log, and a one-page summary for your appointment, see our home blood pressure log guide.
Why home readings jump around
Blood pressure is not a fixed number. It changes with posture, talking, a full bladder, recent caffeine or nicotine, exercise, pain, stress, and even the way the cuff sits on your arm. When two home readings taken a few minutes apart differ noticeably, the cause is often the setup rather than a sudden change in your health. The American Heart Association (AHA) and the American Medical Association’s Target:BP program both stress that home readings are only useful when they are taken the same way each time.
This guide focuses on technique: the device, the cuff, your body position, and the most common sources of error. If you already measure well and want to know what to write down and how to share it, see our companion guide, what to log for home blood pressure.
Step 1: Check that the monitor is suitable
- Use an automatic upper-arm monitor. The AHA recommends an upper-arm cuff device for home use and says wrist and finger monitors are not recommended because they give less reliable readings. A wrist monitor is not a substitute for an upper-arm cuff simply because it is smaller or more convenient.
- Look for clinical validation. In the U.S., ValidateBP.org lists monitors that have been checked against an accepted accuracy standard. A star rating or a “clinically proven” claim on a box is not the same thing.
- Bring it to an appointment. The AHA suggests taking your monitor to your healthcare provider so they can compare its reading with theirs and watch your technique. Many people repeat this about once a year or after buying a new device.
Step 2: Get the cuff size right
A cuff that is too small for your arm can make readings look higher than they really are; one that is too loose or too large can make them less reliable. To check the fit:
- Measure around your bare upper arm, roughly halfway between the shoulder and the elbow, with a soft tape measure.
- Compare that number with the arm-circumference range printed on the cuff or in the manual.
- If you fall outside the range, ask the manufacturer or a pharmacist about a different cuff size for that model rather than squeezing into the standard one.
Arm size can change with weight changes or pregnancy, so recheck the fit if your body has changed.
Step 3: Set up the same way every time
These steps follow AHA and Target:BP home-measurement guidance:
- Avoid caffeine, smoking or vaping, and exercise for 30 minutes before measuring.
- Use the bathroom first; a full bladder can raise the reading.
- Sit in a chair with your back supported and both feet flat on the floor. Do not cross your legs.
- Rest your arm on a table so the cuff is level with your heart.
- Place the cuff on bare skin, not over a sleeve, with the bottom edge just above the bend of the elbow.
- Sit quietly for five minutes before you press start. Do not talk, text, or watch something stressful during the reading.
Step 4: Take more than one reading
The AHA advises taking at least two readings one minute apart and recording all of them. A single reading can be thrown off by a cough or a shift in position; a small set taken under the same conditions is more representative. Measure at roughly the same times each day, such as morning and evening, unless your clinician gives you a different schedule. If you take blood pressure medicine, ask whether readings should be taken before or after your dose.
Write the numbers down straight away. How to lay out a log and what to bring to an appointment are covered in our blood pressure log guide.
Troubleshooting: common causes of odd readings
| What you notice | Likely cause to check first |
|---|---|
| First reading is higher than the second or third | Not enough rest beforehand, or a normal settling effect. Rest the full five minutes and keep recording every reading. |
| Readings vary a lot from day to day | Different times, chairs, arm positions, or cuff placement. Use the same spot and routine for every session. |
| Readings seem high only at home | Cuff too small, arm hanging below heart level, measuring right after walking in or after coffee. |
| Home numbers are much lower than at the clinic | This can happen and is worth discussing; it is one reason clinicians ask for home readings. Bring the monitor so they can compare. |
| The monitor shows an error | Movement, talking, a loose cuff, or low batteries. Rewrap the cuff, sit still, and try again after a minute. |
| Left and right arms give different numbers | Small differences are common. Target:BP suggests a clinician compare both arms once and use the arm with the higher reading from then on. Use that arm every time. |
Habits that make readings less reliable
- Measuring again and again because one number worried you. Repeated cuff inflation and anxiety can push readings around. Follow the recheck plan your clinician gave you.
- Measuring through clothing or with a rolled-up sleeve squeezing the arm.
- Sharing one monitor between household members with very different arm sizes without checking the cuff range.
- Recording only the readings that look good, or only the ones that look bad.
- Changing, skipping, or doubling medicine because of a home number. Talk to your clinician first.
When a reading needs prompt action
Follow any thresholds your own clinician has given you. As general guidance, the AHA says that if a reading is higher than 180/120 mm Hg, you should wait at least one minute and measure again. If it is still that high and you have symptoms such as chest pain, back pain, shortness of breath, numbness or weakness, a change in vision, or difficulty speaking, call 911 (US) or your local emergency number. If it stays that high without symptoms, contact your healthcare professional promptly.
Symptoms such as chest pain, sudden weakness on one side, trouble speaking, or a sudden severe headache need emergency care whatever the monitor says: call 911 (US) or your local emergency number. Do not delay calling for help to take another reading.
Frequently asked questions
Is a wrist monitor good enough?
For most people, the AHA recommends an upper-arm monitor. Some people cannot use an upper-arm cuff, for example because of very large arms; if that applies to you, ask your clinician which device and technique to use. Wrist readings are more sensitive to position, so if you do use a wrist device, follow its manual closely—usually keeping the wrist supported at heart level and still—and ask your clinician to check its readings against theirs.
Which reading do I use if the three are different?
Record all of them. Your clinician will usually look at the pattern or average over several days rather than any single number.
How do I know my technique is right?
Take your monitor to an appointment and ask a nurse or clinician to watch you measure. It is the quickest way to catch a cuff, posture, or arm-position problem.
Key takeaways
- Most jumpy home readings come from setup differences, not sudden health changes.
- Measure your arm and match it to the cuff range before trusting any reading.
- Rest five minutes, sit supported with feet flat and arm at heart level, and stay silent while the cuff inflates.
- Take at least two readings a minute apart and keep every one.
- Know the AHA steps for a reading above 180/120 and which symptoms mean calling 911 (US) or your local emergency number.